Step-by-Step Guide
How to Launch a Company Store in 20 Minutes
From browsing the supplier marketplace to a live, branded storefront with automatic fulfillment. No developers, no inventory, no upfront costs. Here's exactly how to do it.
Last updated: April 2026 · 7 steps · ~20 minutes
What you need
- A free Brikl account
- Your logo files (PNG, EPS, or DST)
- A banner image for your store (optional)
Time required
~20 minutes for a fully configured store with embellished products, pricing, and branding.
Cost
Free to launch. 3.5% commission per transaction on the Launch plan.
Browse the Supplier Marketplace
Log in to your Brikl dashboard and open the Supplier Marketplace. Browse 7,500+ products from 180+ brands across 12 fulfillment partners. Use the category tabs, filters, and search bar to narrow down by product type, decoration method, brand, or fulfillment partner. Every product shows real-time wholesale pricing and available decoration methods.
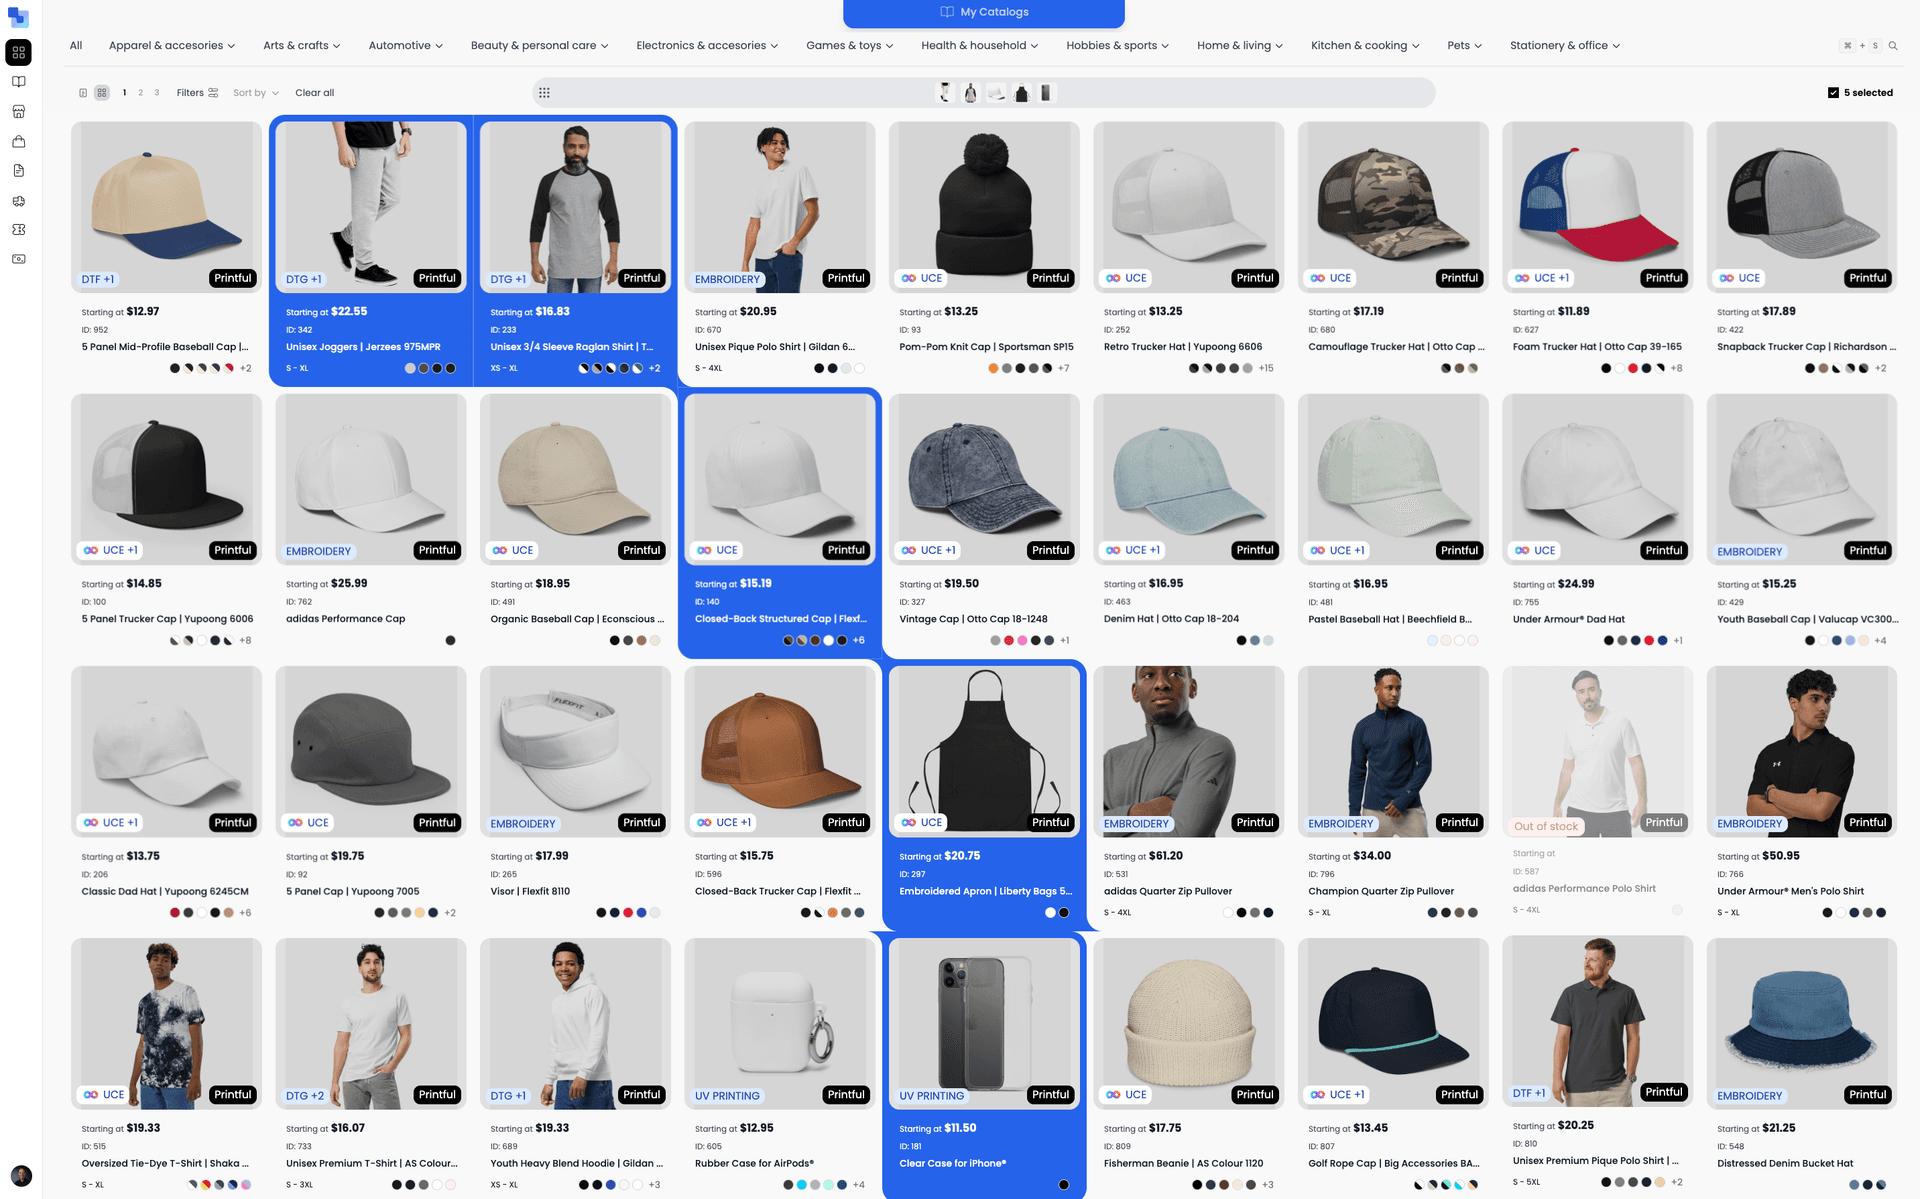
Tip: Use the grid view and zoom controls to see more products at once. Double-click any product card to open a detail sidebar with pricing, available sizes, colors, and decoration options.
Drag products into a catalog
Open the catalog tray at the top of the marketplace screen. Your existing catalogs appear as thumbnails. Drag products from the marketplace directly into any catalog — or create a new one. Each catalog is an independent collection of products that you can assign to one or more stores.
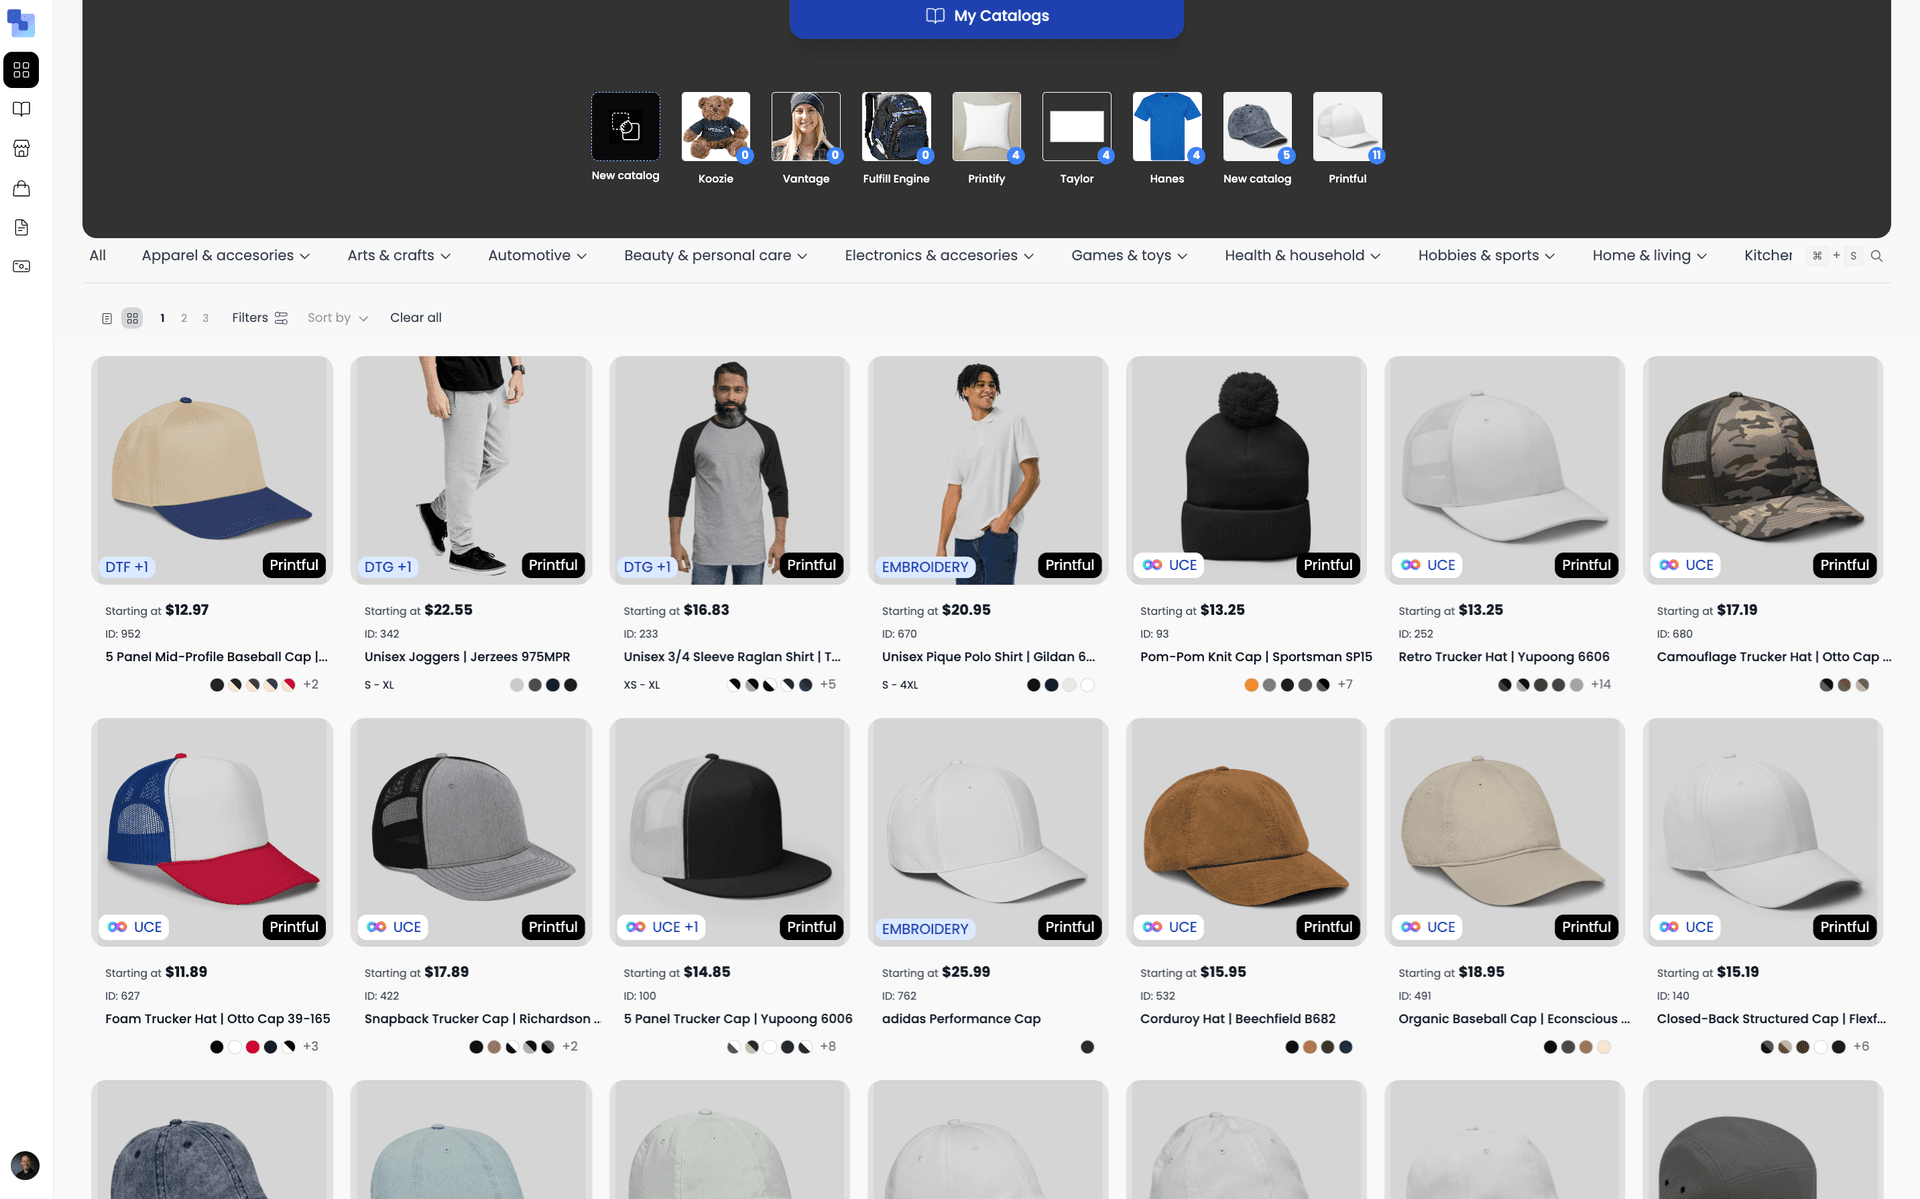
Tip: The smart bar at the bottom tracks your selected products as you continue browsing. You can add products from different brands and categories into the same catalog.
Embellish products with logos and decoration
Open the Design Tool for any product in your catalog. Select decoration locations (left chest, full back, sleeve, etc.), upload logos from your logo library, configure embroidery thread profiles, and set text zones for personalization. The Composition Editor shows a live preview of the finished product.
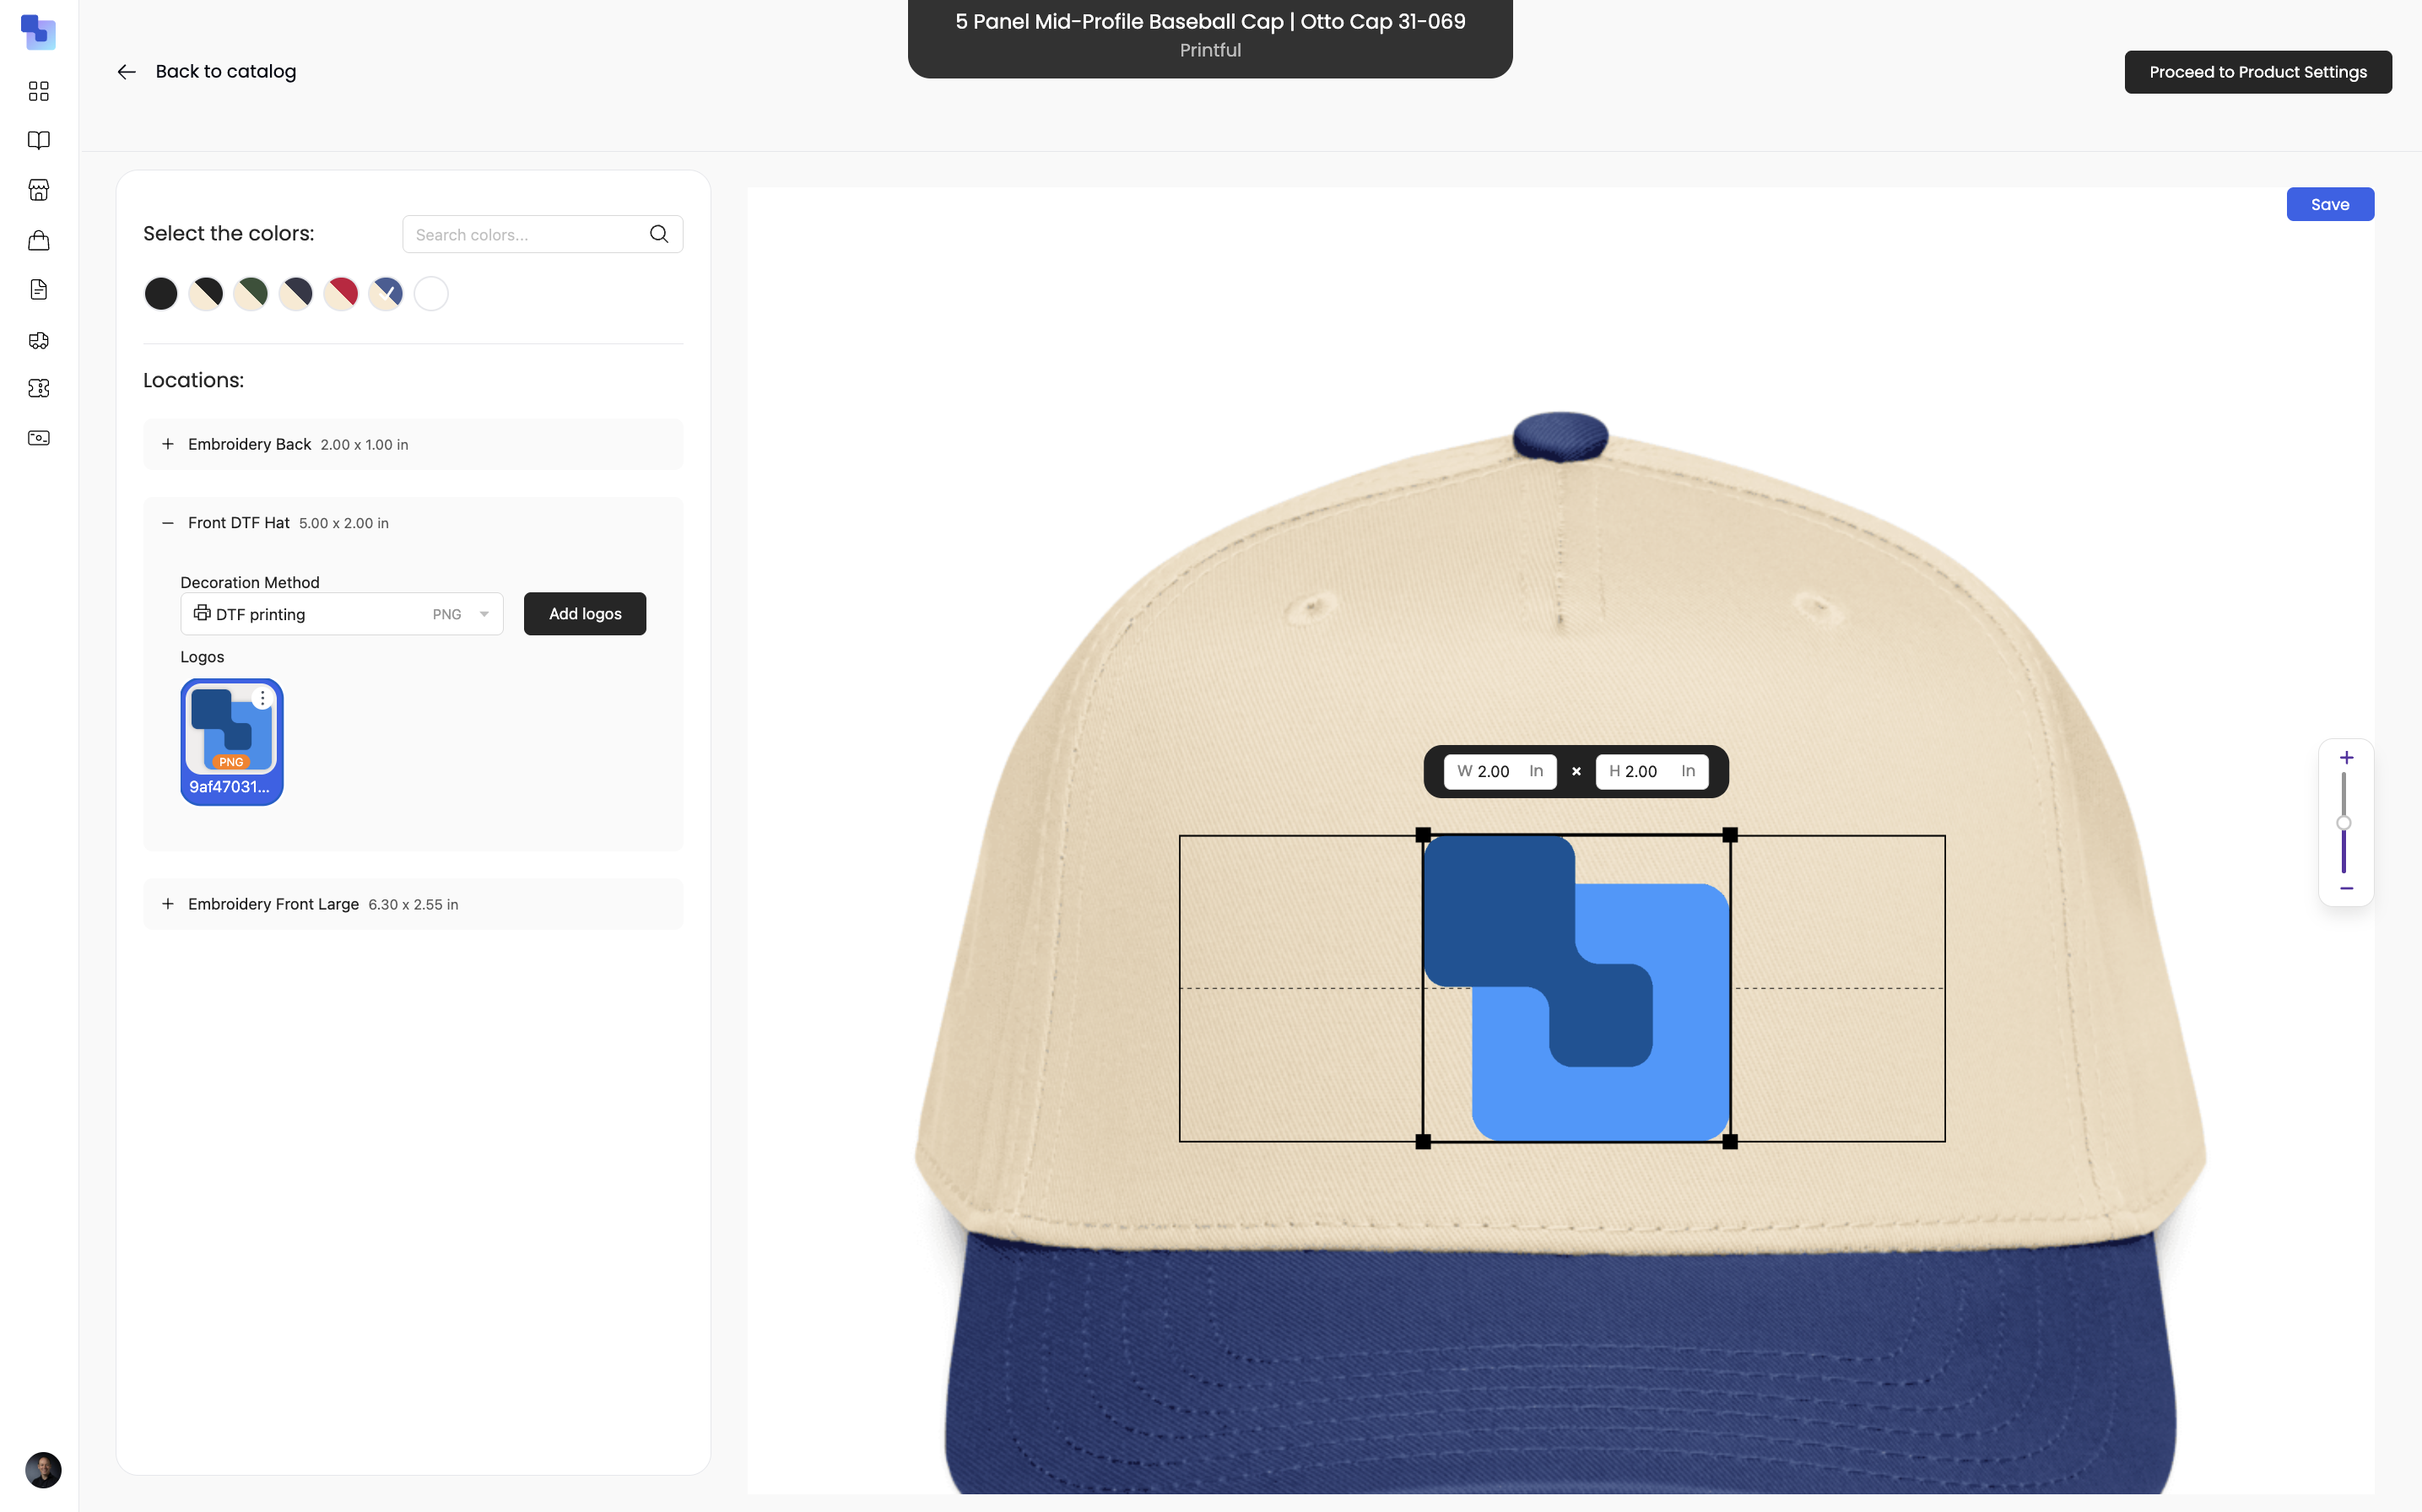
Tip: Use the Product Setting Table for bulk configuration — assign logos to hundreds of variants at once without opening each product individually.
Set your pricing and markup
In the catalog, expand any product to see all variants (sizes, colors). Set your retail price as a markup percentage or fixed price. Brikl shows real-time COGS alongside your markup so you can see your exact margin per unit before the store goes live. You can also configure upcharges, extra fees, and fundraiser amounts.
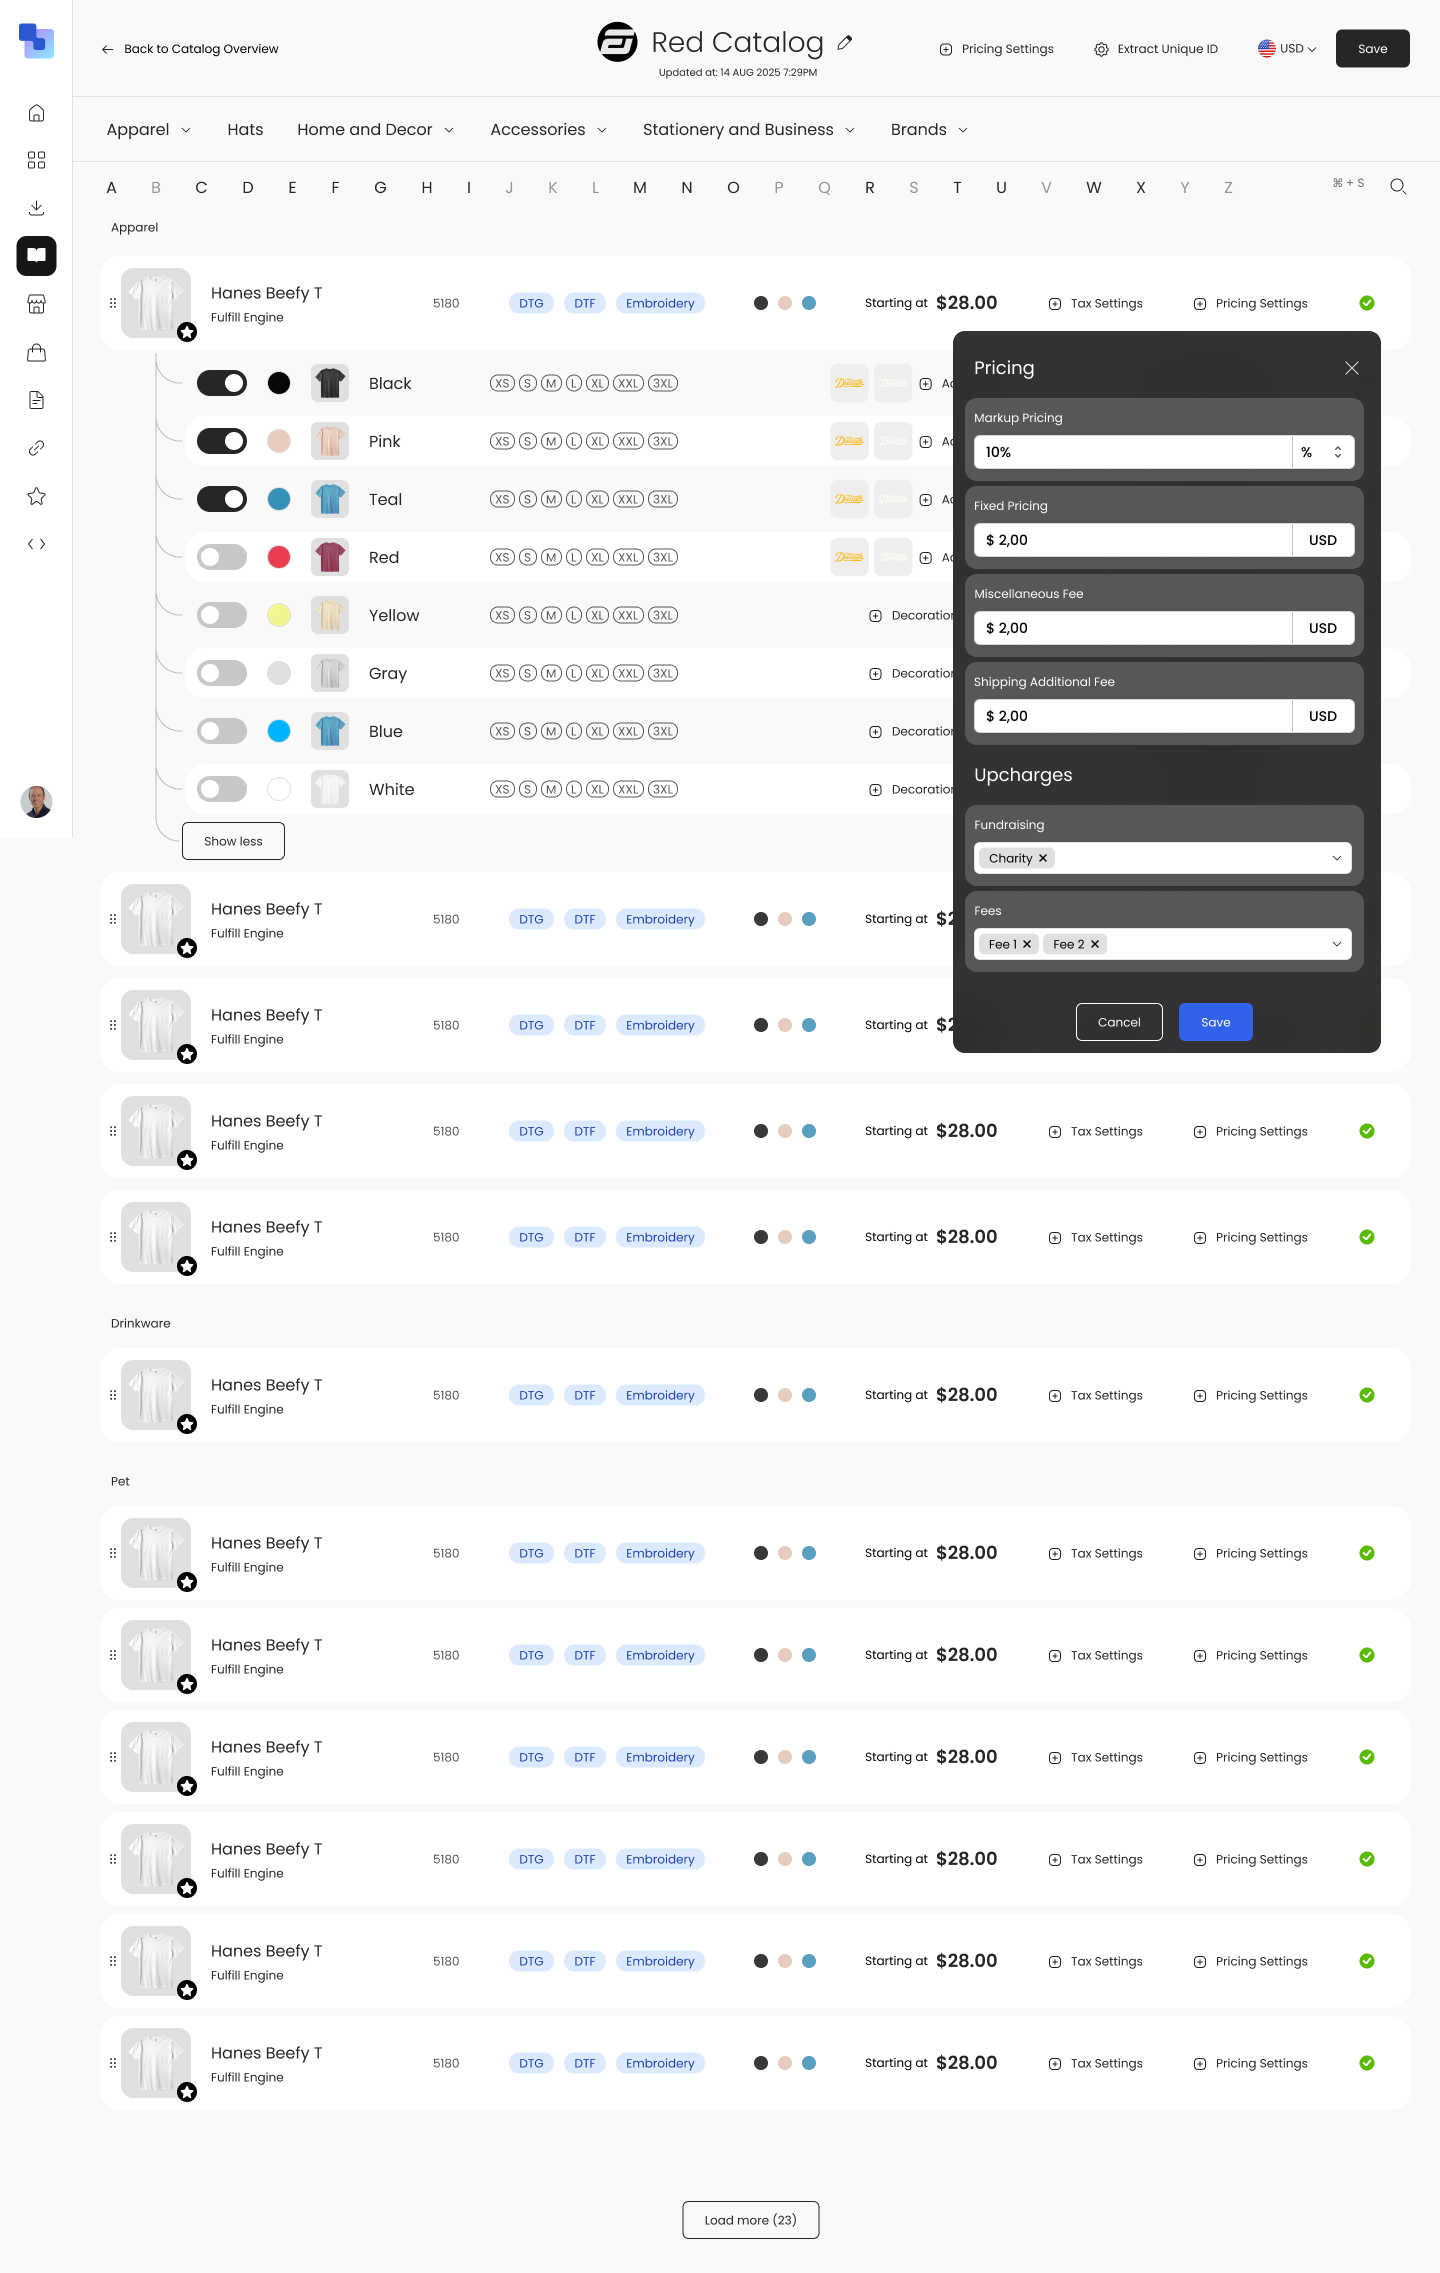
Tip: A 50% markup is a common starting point. For embroidered polos and premium items, many distributors mark up 60-100%.
Create a new store
Go to the Stores section and click Create Store. Enter the store name, select your organization, and fill in basic details — store description, contact email, and shipping address. This takes about 60 seconds.
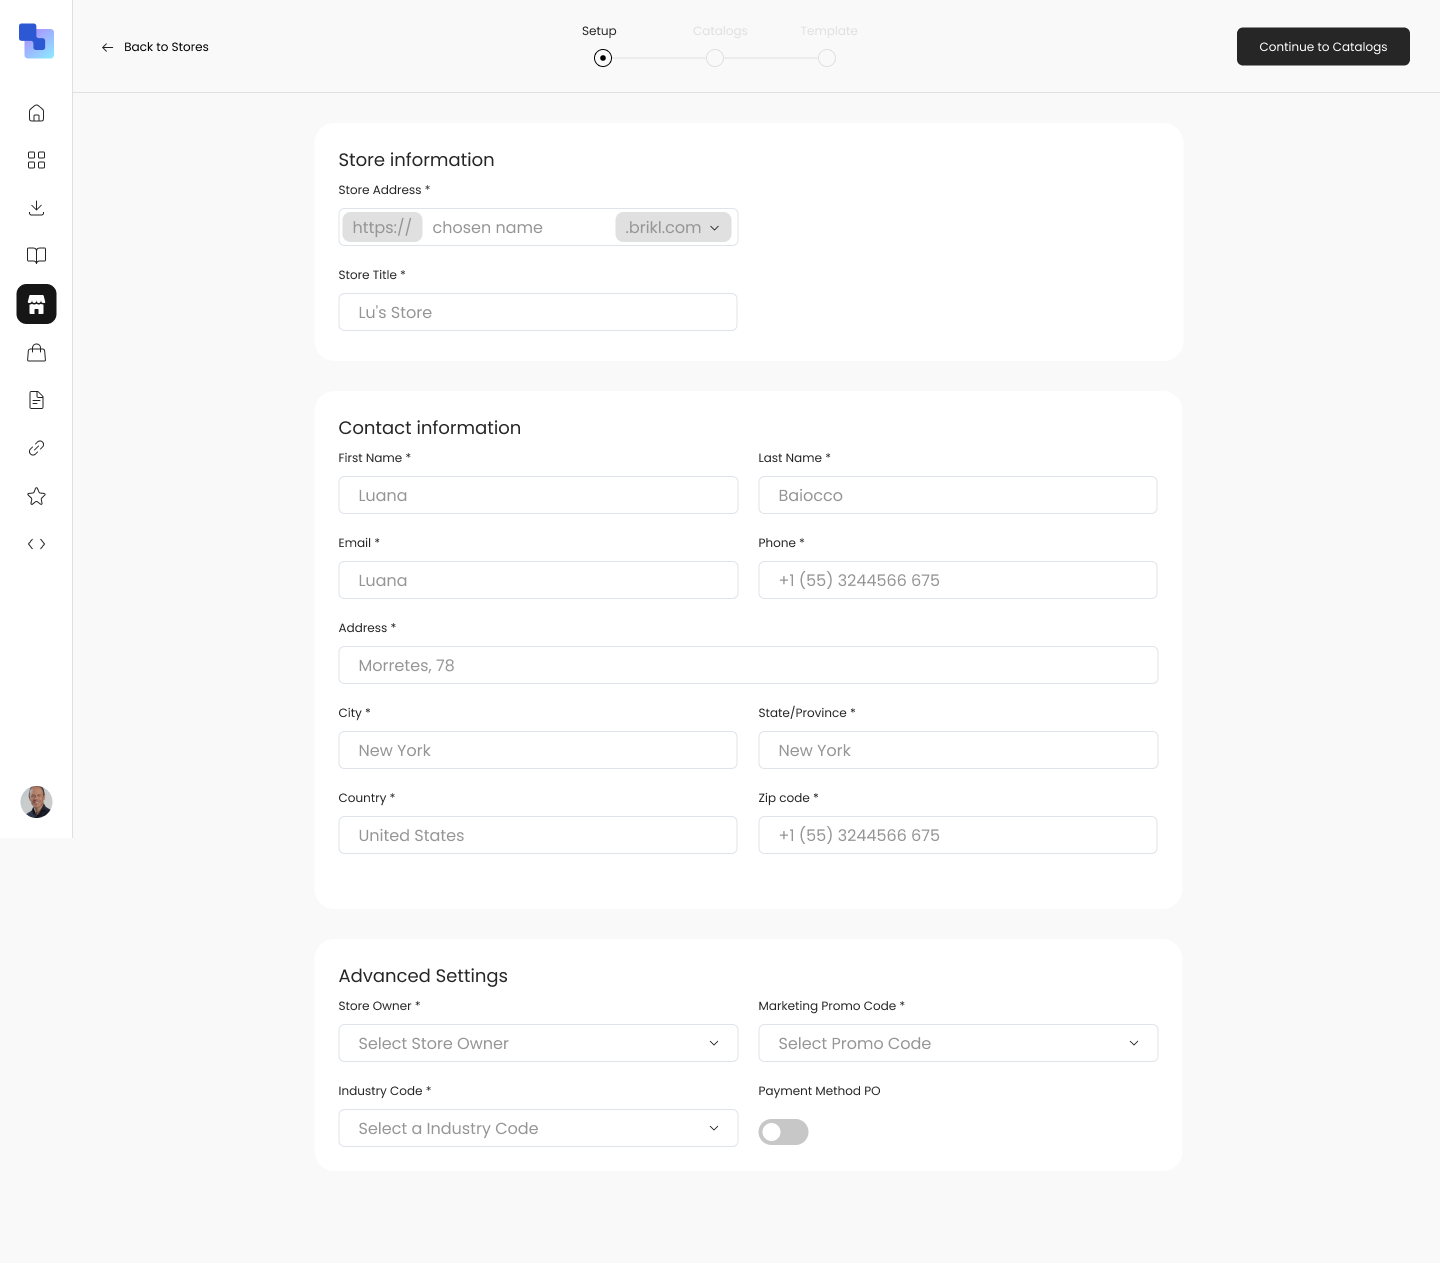
Tip: You can create unlimited stores on all Brikl plans. Create a separate store for each client, team, or program.
Choose a template and brand it
Select from 7+ professionally designed store templates. Each template controls the layout, navigation, and visual style of your storefront. Upload a banner image, set your brand colors, and add a custom logo. If you have a custom domain, connect it by adding a CNAME record — SSL is provisioned automatically.
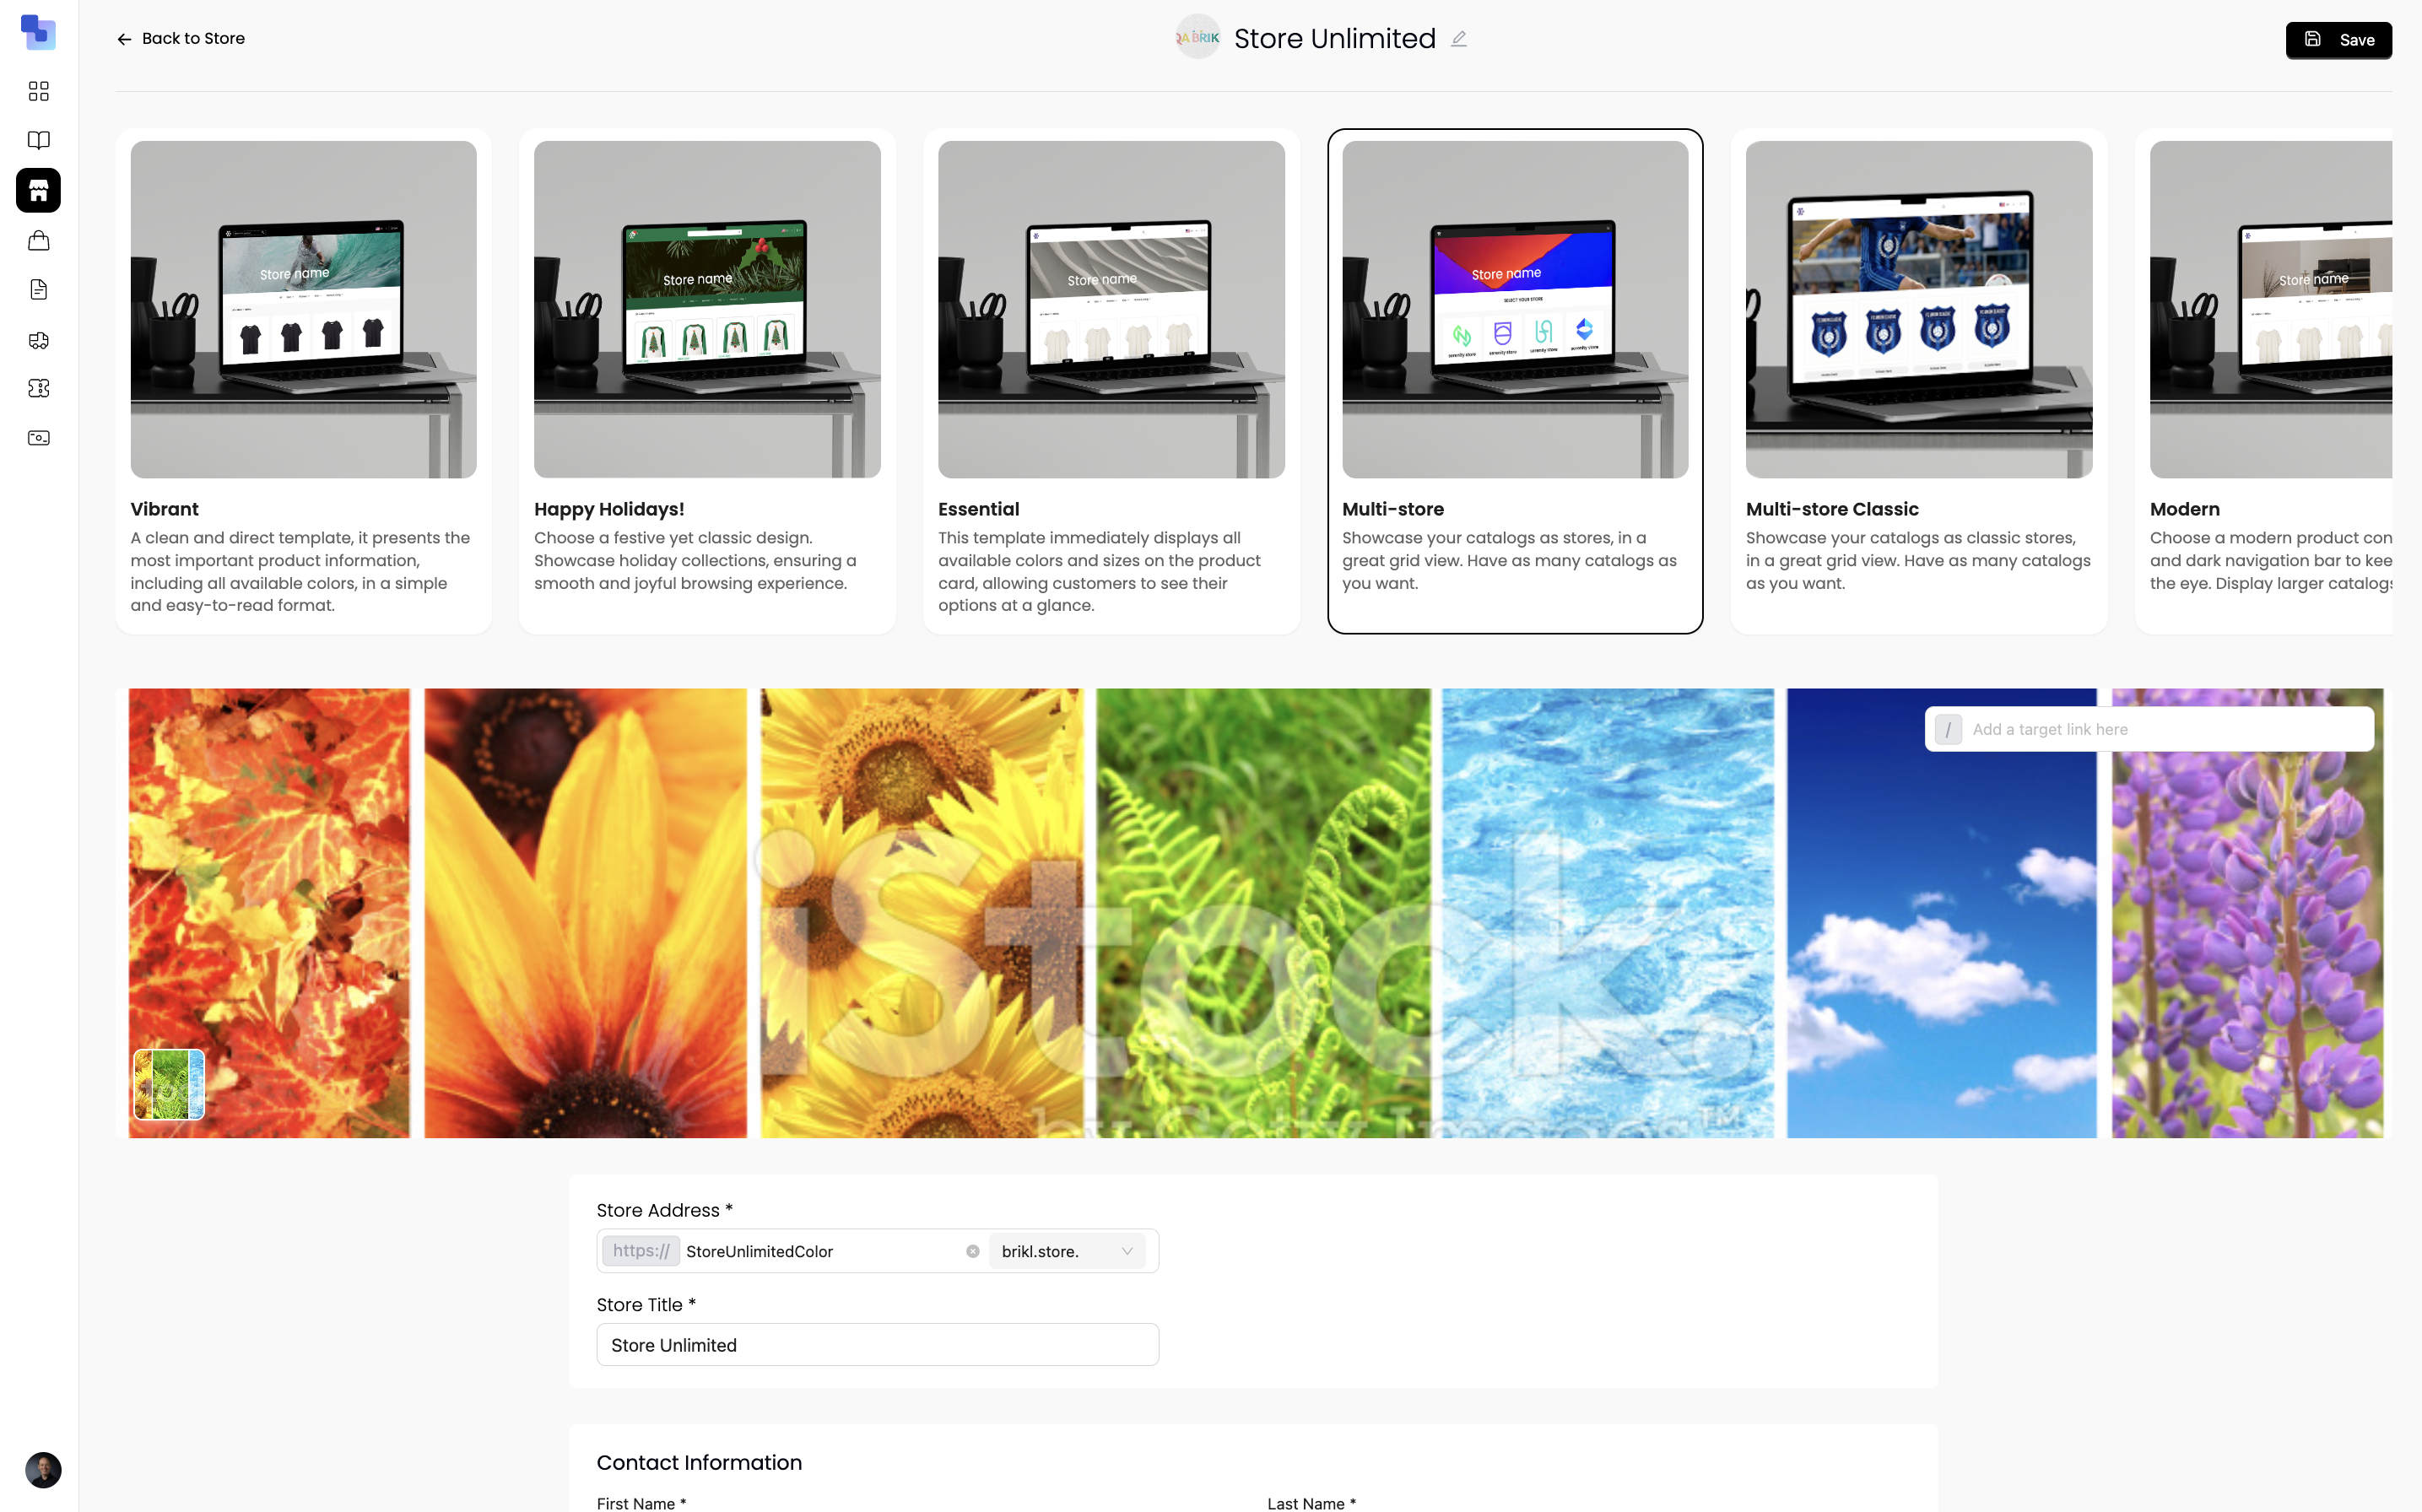
Tip: You can switch templates at any time without losing your catalogs, products, or settings. Your first store build is free if you want Brikl to set it up for you.
Assign catalogs and go live
In your store dashboard, assign one or more catalogs to the store. Toggle catalogs on or off to control what shoppers see. Review your store preview, then publish. Your store is now live — shoppers can browse, personalize products, and check out. Orders route automatically to the correct fulfillment partner, production files are sent with the order, and tracking numbers are generated when items ship.
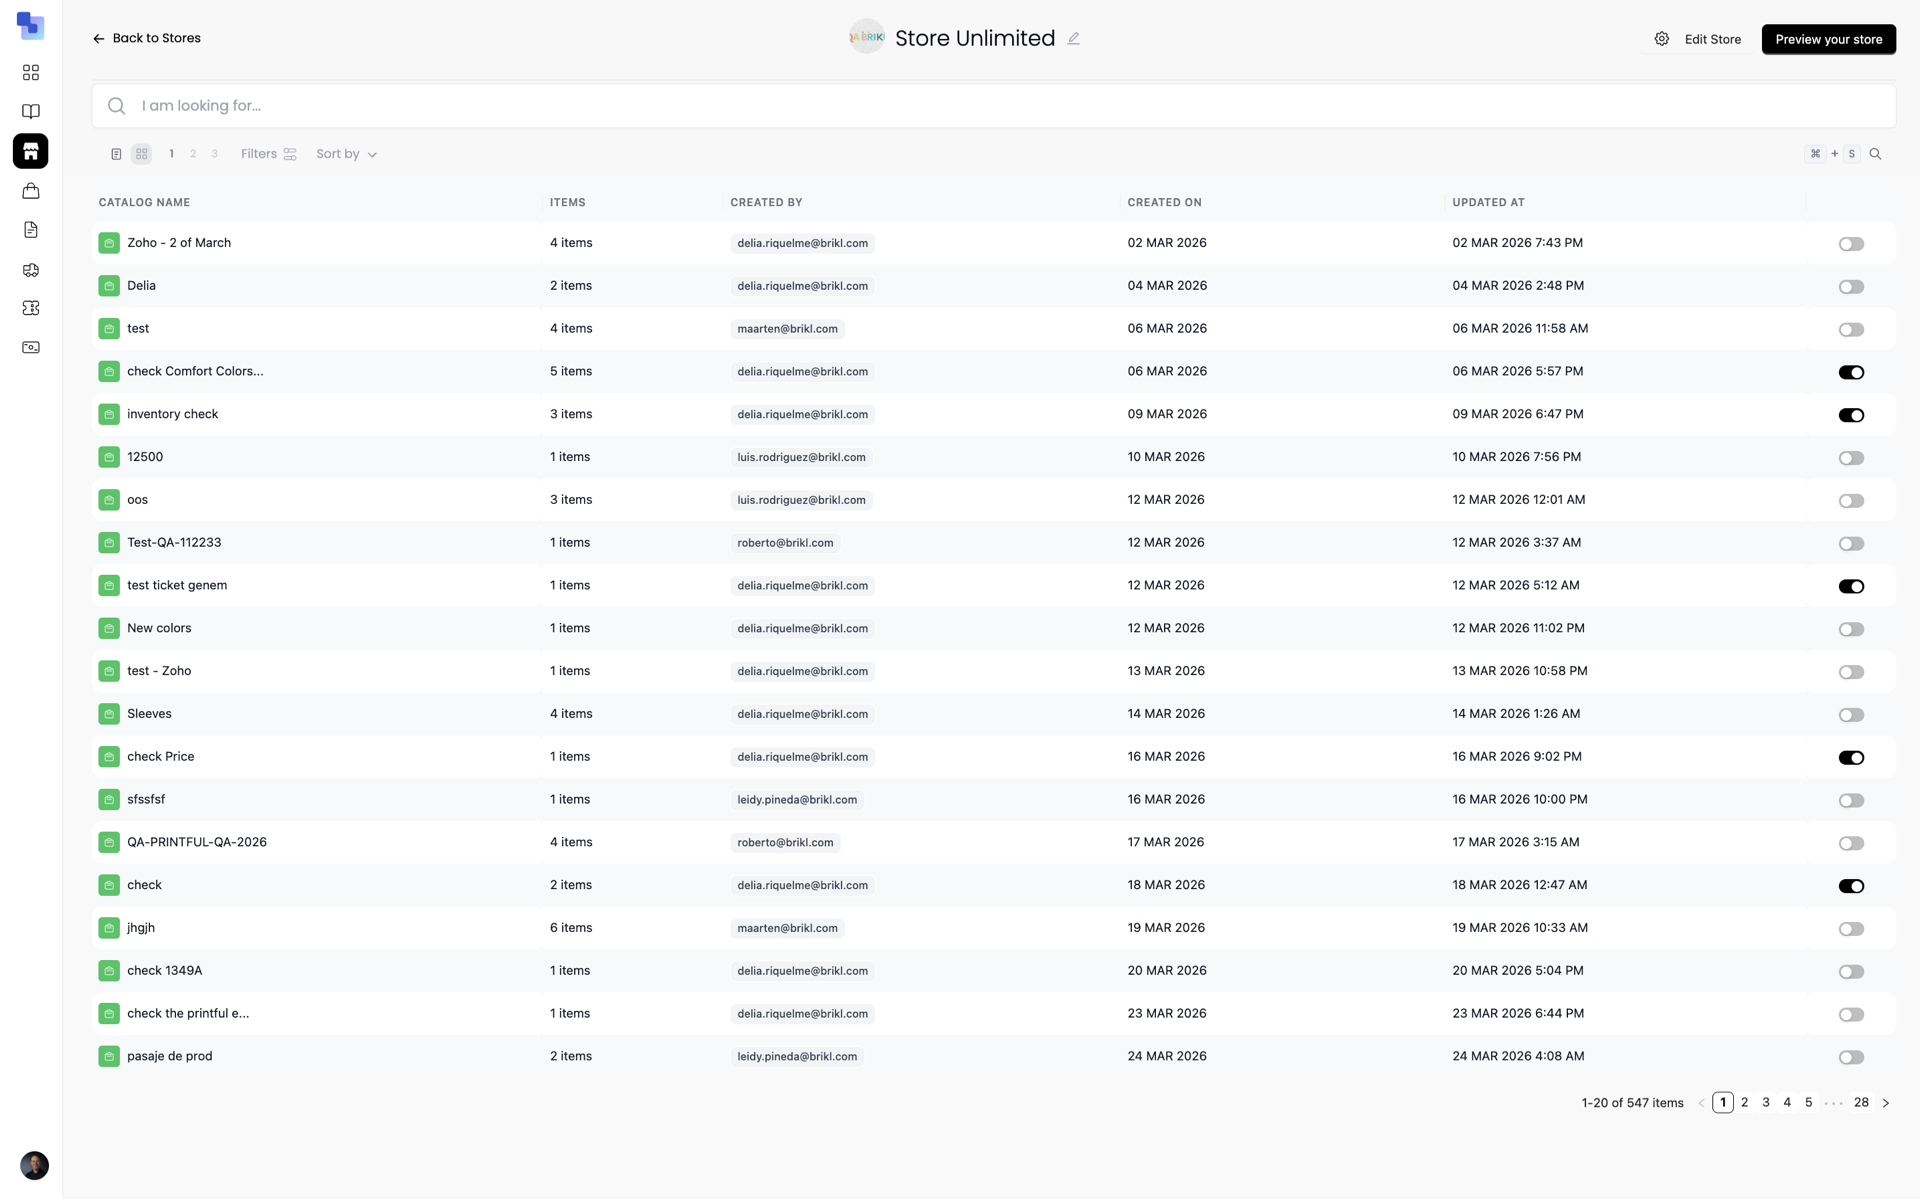
Tip: After launch, monitor orders from your dashboard. Each order shows real-time status: received, in production, shipped. Your commission is calculated and queued for payout automatically.
What happens after launch
Shoppers browse and buy
Customers visit your store, select products, personalize with names or numbers, and check out. Payment is captured automatically via Stripe.
Orders route automatically
Each order is sent to the correct fulfillment partner with production-ready art files. Multi-partner orders are split automatically at checkout.
You get paid
Payouts are disbursed on the 1st and 15th of each month via Stripe Express. Your profit is Order Total minus COGS, shipping, and platform fees.
Frequently asked questions
Can I switch store templates after launching?
How do I connect a custom domain?
What happens when a customer places an order?
Do I need to hold inventory?
How much does it cost to launch a store?
Can I run multiple stores from one account?
Ready to launch your first store?
Create your free account and follow the steps above. No credit card required.