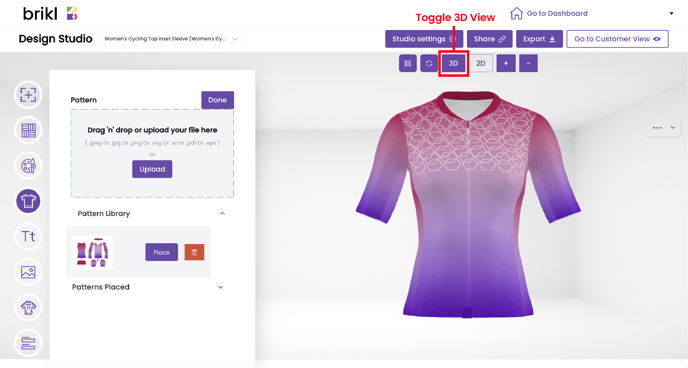
Create 2D flat sketches in Illustrator. Upload them to Brikl through simple drag-and-drop to see a real-time 3D rendering.
The 3D Visualization Studio is a powerful tool to create 3D renderings from 2D flat sketches you have created in Illustrator. Once done successfully, you can download the images from the Studio, and upload them to a MicroStore or use for marketing purposes.
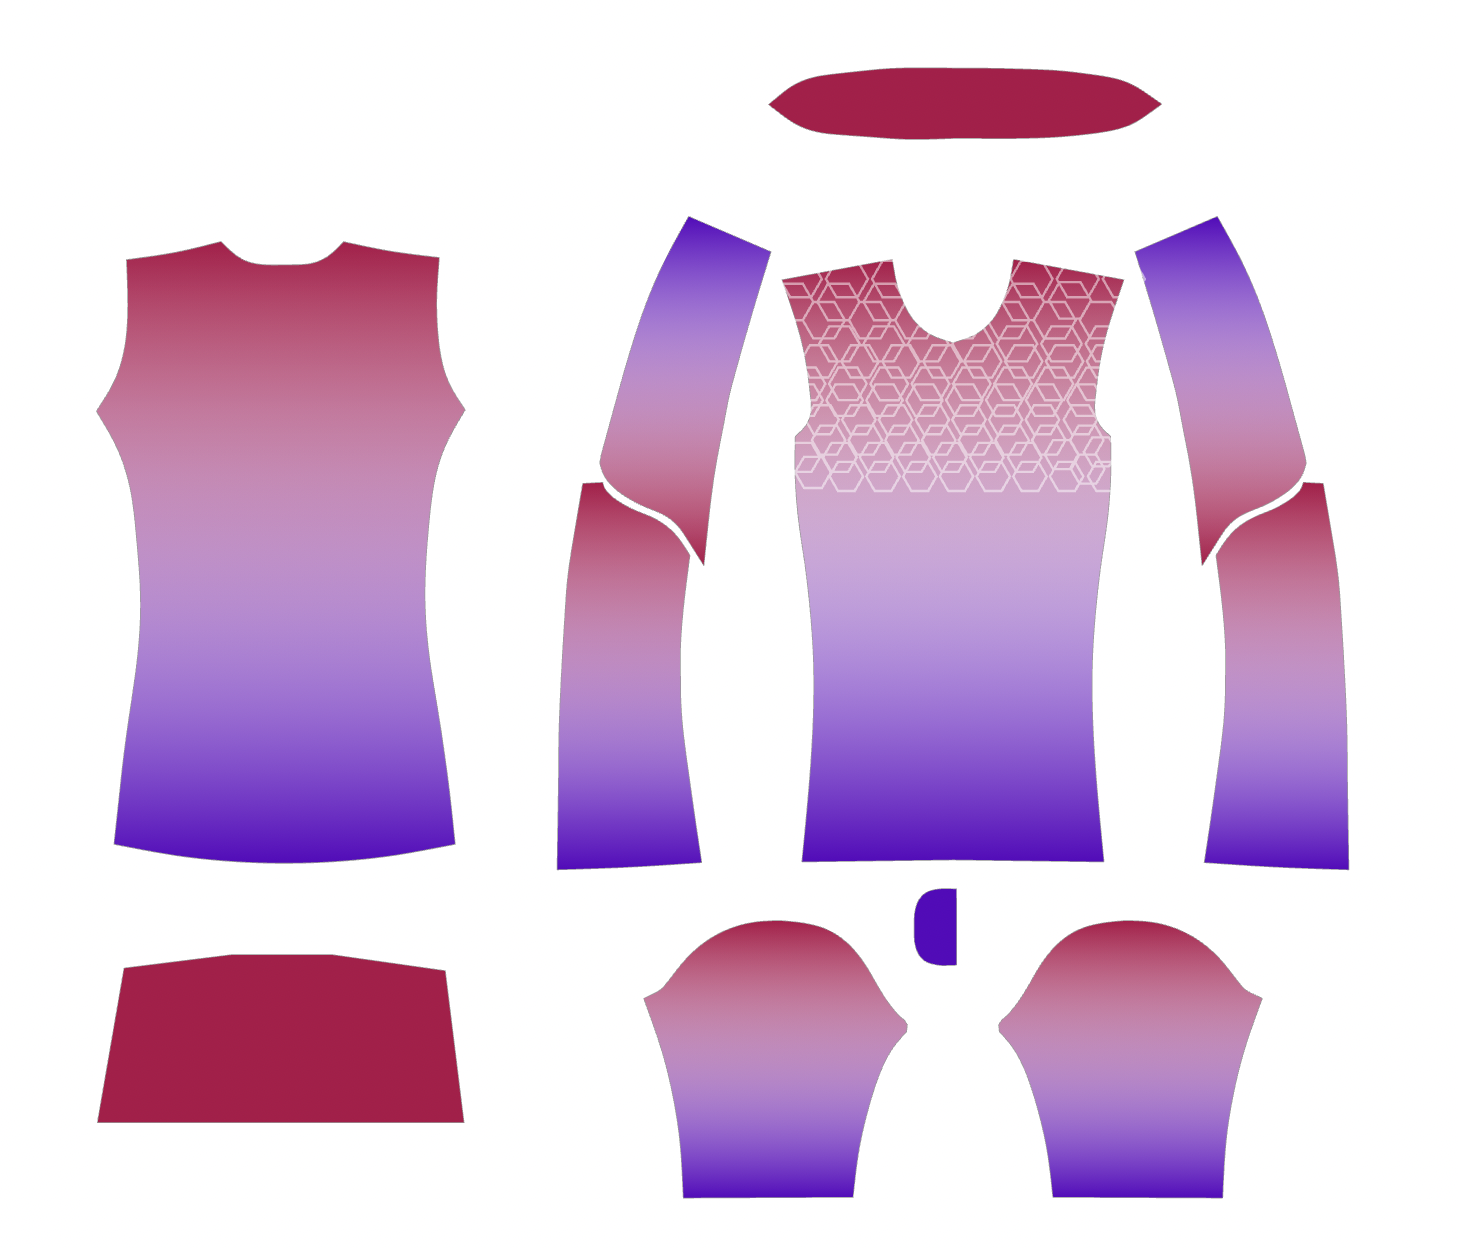
How to create a design in Illustrator and upload it to Brikl
Step 1 - Start with a product template
There are two options:
- You can create a design based on the production pattern or design template you have submitted to Brikl for digitization.
- You can create a design based on the digitized pattern Brikl created and which you can download from the Studio.
- Go to Dashboard > Design > 3D Visualization > Studio Settings > Assets
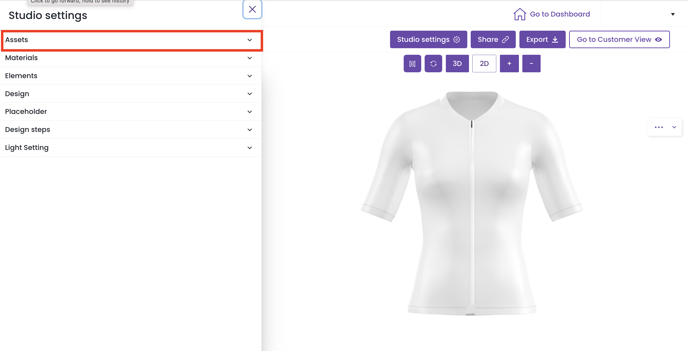
- Download the product template:
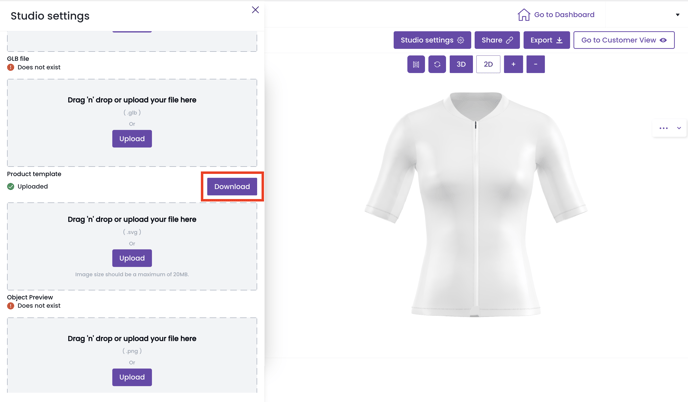
- Go to Dashboard > Design > 3D Visualization > Studio Settings > Assets
-
- Save your SVG product template file
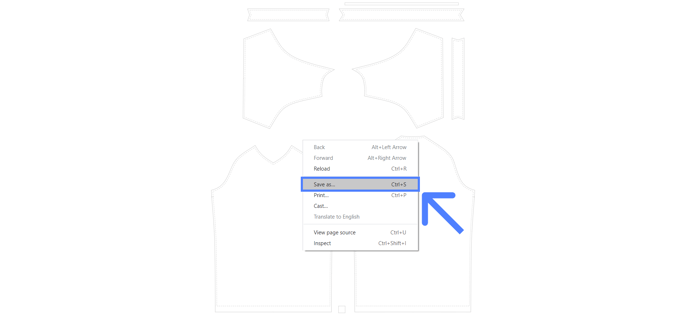
- After clicking download, a new tab will appear in your browser.
- Right-click on the page and choose 'Save As'.
- Save your SVG product template file
-
-
- Make sure that the "Save As" type is an SVG document, then click save to download your SVG. You are ready to edit the SVG template in Illustrator.
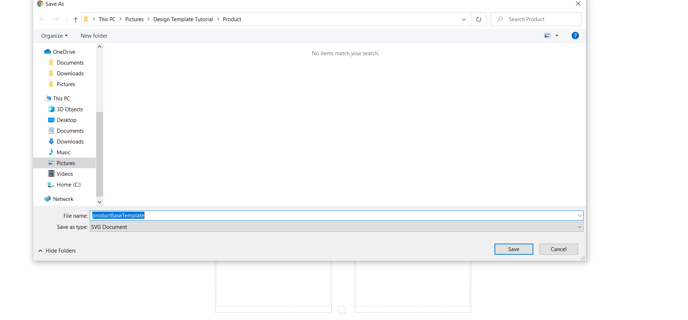
- Make sure that the "Save As" type is an SVG document, then click save to download your SVG. You are ready to edit the SVG template in Illustrator.
-
Step 2 - Open your product template in Illustrator (Optional)
In case you have downloaded the digitized pattern from the Brikl Studio, please go through following steps:
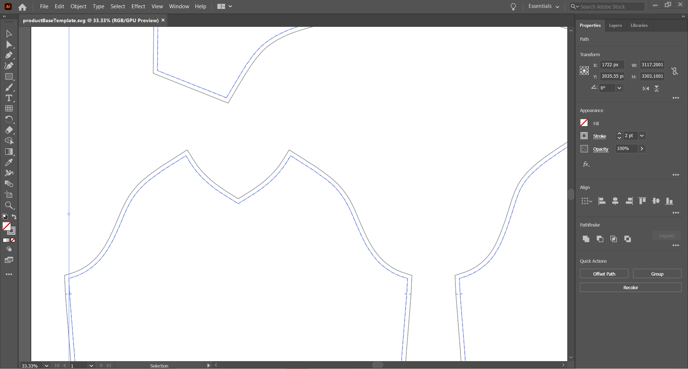
- Open your SVG file in Illustrator.
- You'll notice multiple lines: A stitching line, cutting line, and sublimation line. The distance between the stitching line and the cutting line is what is called “seam allowance”.
- Keep the outermost line which is either the cutting line or the bleeding line. Then remove all other lines.
The cutting/bleeding line must be the outermost line of the largest size of the pattern.
Step 3 - Create a design in Illustrator
Open the product template in your design software (Adobe Illustrator) and start designing. Once you have finished, export your design template as a PNG.
For help exporting your template in PNG and other formats, refer to How to export design templates in Adobe Illustrator.
When downloading from Illustrator...
- Each product has its own unique pattern layout. Do not change the position of the pattern pieces. Changing the position will make it no longer compatible with the Brikl UV map that is available in the system.
- Each product has its unique artboard size. Do not change the artboard size. Changing the artboard size will make it no longer compatible with Brikl's UV map that is available in the system. You can check the artboard size in Illustrator by going to 'Document Setup'.
Step 4 - Upload the 2D Design to Brikl
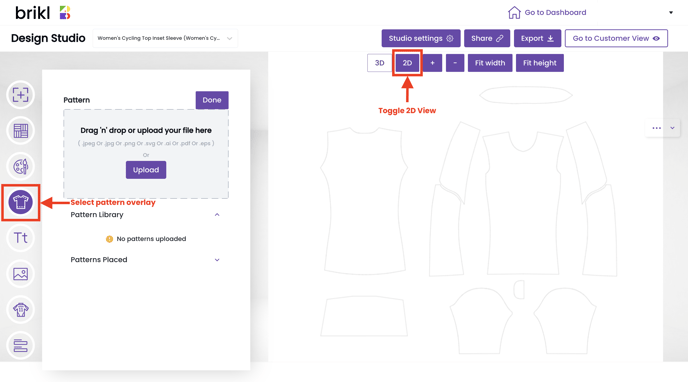
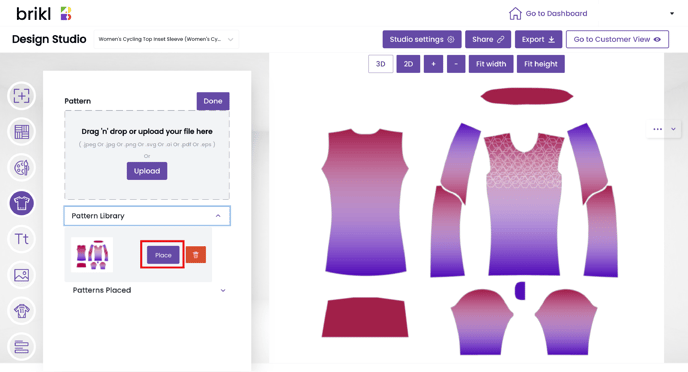
- Select the pattern overlay step. Drag and drop the design file.
- Toggle to a 2D perspective. Next, place the image pattern on the 2D view and toggle to a 3D perspective to see your 2D image rendered into 3D in real time.