The last thing you want to do is search endlessly for products you want to add to your MicroStore. That’s why we’ve made it easy to search, filter, sort, and add the products you’re looking for quickly, and to override product details.
Skip to...
Step 5 - View selected products
Step 9 - Override product details
How does this work?
The first step is always to create a MicroStore and then assign the products you want to sell to it.
Before you assign a product to a MicroStore, you must first create a product.
Step 1 - Getting started
Go to your Dashboard > Sales Channels/MicroStores > Catalog. Click “Add Products.”
-png-2.png)
Step 2 - Search products
This enables a full-page interface where you can search and filter to find products. You can:
You’ll be able to see the search results and the number of search results the system has found.
-png-2.png)
Step 3 - Filter products
After the keyword search is done, you can narrow down the search result more by using filters.
-png-2.png)
Filter search results by Brand, Collection, Product Options, and Product Option Values.
When inputting text in search fields, hit “Enter” to apply the filter.
-png-2.png)
Once a filter or filters have been applied, you'll see which ones have been set up in the table. Hover over the ‘i’ icon to see applied filters.
-png-2.png)
If there are no results from a search or selected filters, try resetting your search:
-png-2.png)
Step 4 - Sort products
Aside from searching and filtering, you can also sort by product name:
-png-2.png)
Step 5 - View selected products
Once you have searched and filtered results to your satisfaction, select which products you’d like to assign to your store.
The selected items in the “All Products” tab will also appear in the “Selected Product” tab. This way, you can ensure that you can have a final review of the products you’ve selected before you assign them to your store.
Once you’ve selected items in the “All Products” tab, you will also see them in the “Selected Product” tab. This way, you can ensure that you can have a final review of the products you’ve selected before you assign them to your store.
You can unselect checked products in either the "All Products" tab or the “Selected Products” tab too.
%20(1)-png.png)
-png-1.png)
Step 6 - Assign products
Happy with your selected products? Assign them to the store by clicking “Add to MicroStore.”
You can add products to your MicroStore from the “All Products” or “Selected Products” tab.
-png-1.png)
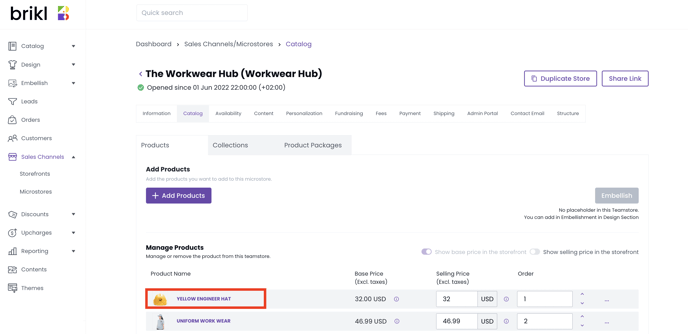
Your products are now viewable in the MicroStore > Catalog > Product list.
-png-1.png)
Step 7 - Add more products
You can always add more products by clicking the “Add Products” button to perform a search and add filters again. However, to ensure products aren’t duplicated, you will not see already assigned products in your search anymore.
-png-1.png)
-png-1.png)
Step 8 - Unassign products
Assigned products can be always unassigned as below:
Step 9 - Override product details
Products that have been assigned to a MicroStore, can be overridden. Overriding is the replacement of data or files in your database. Read more on how to assign a product here.
There are two entry points in the Brikl Dashboard to assign products to a MicroStore.
- The first entry point is in Dashboard > Product > Sales Channel. Read more here.
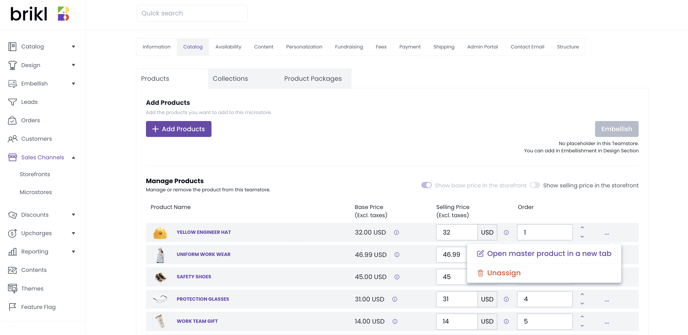
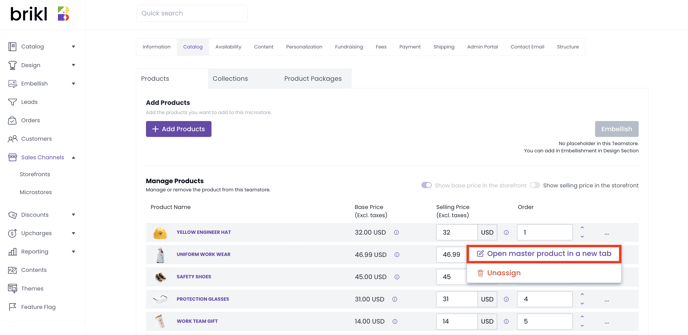
- The second entry point is in Dashboard > Sales Channel > MicroStores > Catalog > Product. Read more below:
Step A - Click the Product link
If you want to access the Master product, you can click "Open master product in a new tab."
Once you have assigned a product to a specific MicroStore, you can no longer make changes to the existing product options of the master product.
You can, however, add new product option values (for example, colors or sizes) to the master product, but those will not automatically apply to the assigned products of your MicroStores. If you want those new product option values to apply, you must visit each MicroStore and assign them individually.
Step B - Update Product Information
You can update the Product Name, Accounting ID, Internal ID, Custom URL, and Product Description. Editing these fields is optional. 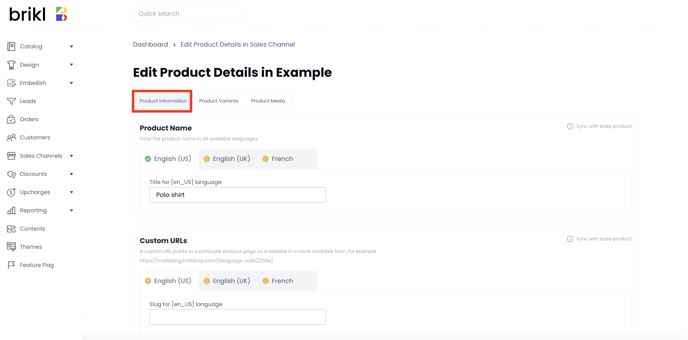
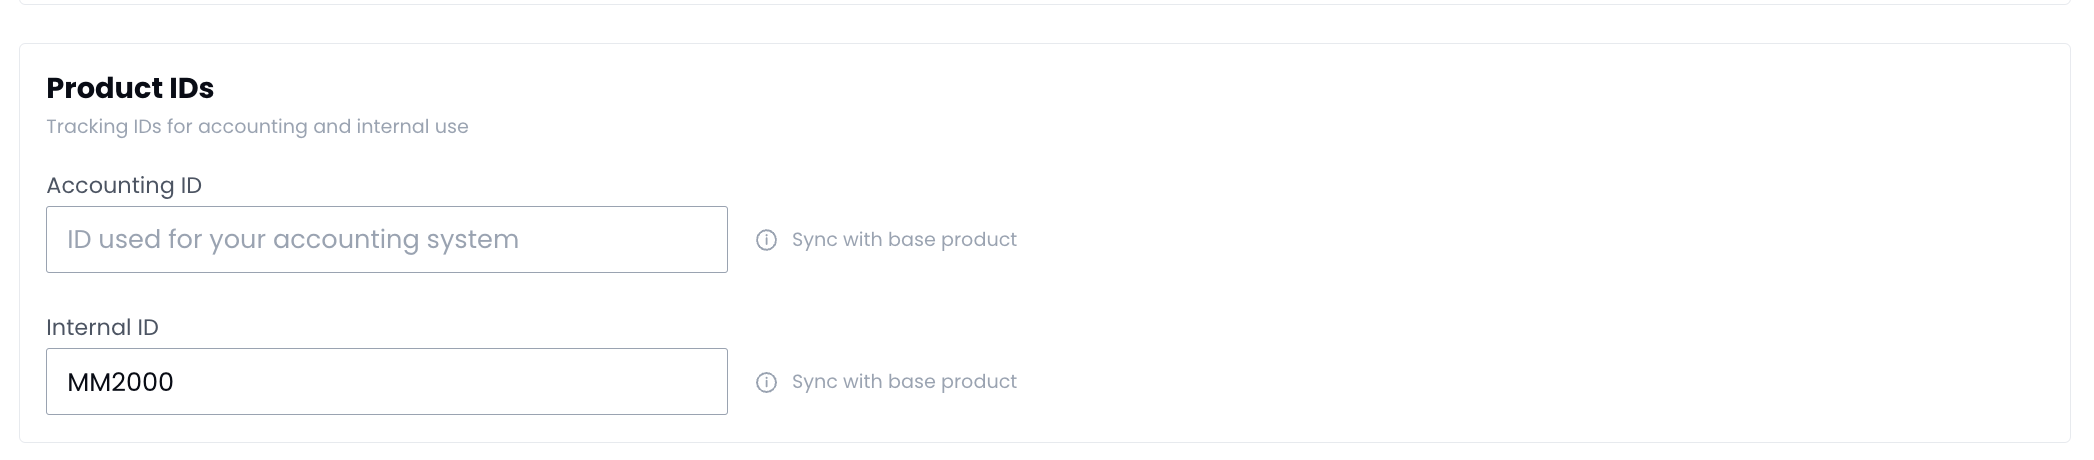
Internal ID and Accounting ID
- If the user overrides the Internal ID or Accounting ID, the updated Internal ID and Accounting ID will be shown.
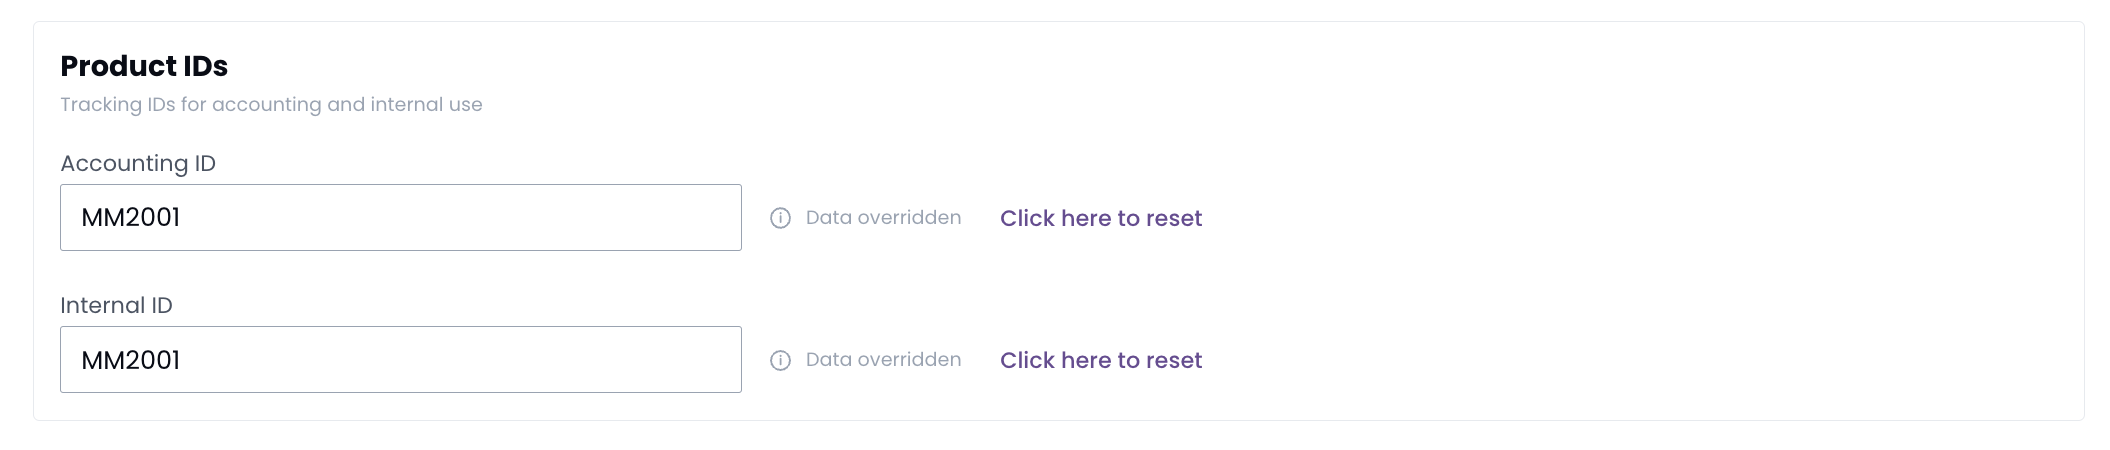
- If the user does NOT override the Internal ID or Accounting ID, the master product Internal ID and Accounting ID will be shown instead.
- If the user deletes the Internal ID or Accounting ID, the master product Internal ID and Accounting ID will be shown instead.
Languages
- If you like to add more languages, make sure to set this up for the master product first.
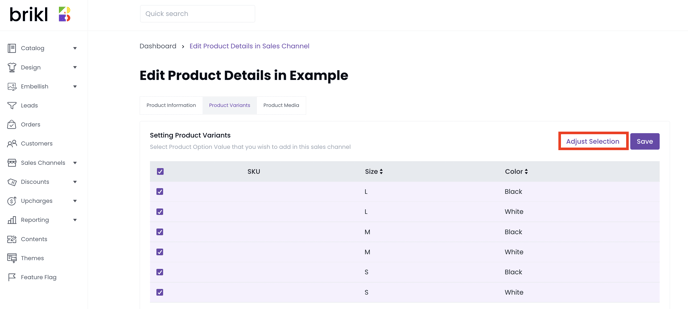
Step C - Update Product Variants
Decide which variants you want to assign to a MicroStore. By default, all product variants are assigned to a MicroStore. You can adjust the assigned product variants in two ways.
Option 1: Unselect the variants that you don't want to assign to the MicroStore and click Save.
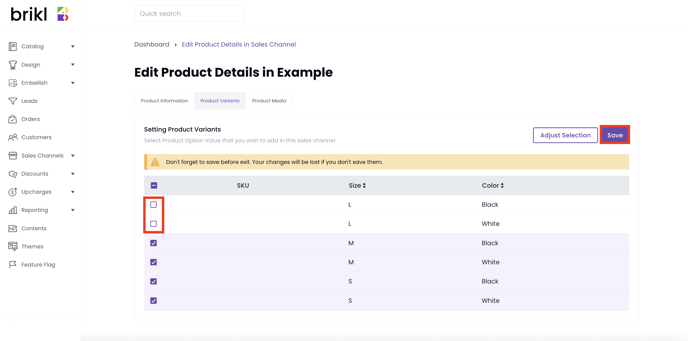
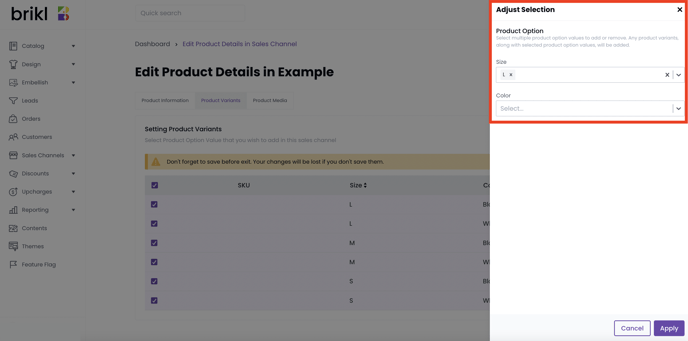
Option 2: Use the filter option (in case you have many variants to select from)
Click "Adjust Selection" to filter the production option values and click Save.
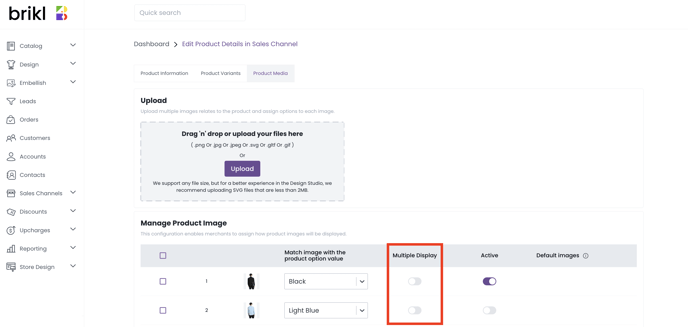
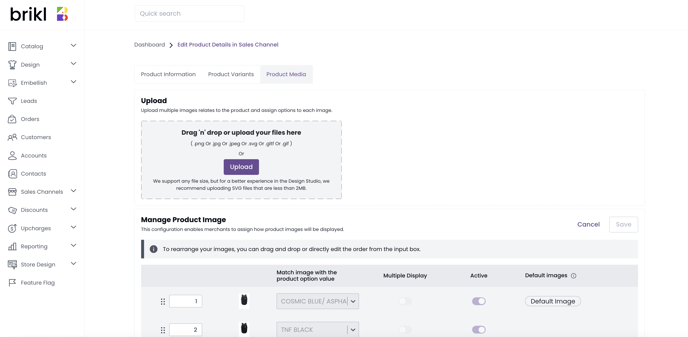
Step D - Update Product Media
In the Product Media tab, you can upload new images as well as manage images that have been uploaded newly or were previously available from the Master Product (with or without embellishment).
Option 1: Upload product images
You can upload an image by clicking the upload button or dragging and dropping one or multiple images in for a product.
You can edit the image by:
- Cropping: Crop your image using custom dimensions, in square and circle shapes, or 16:9 and 4:3 ratios.
- Inverting: Flip a color to the opposite color, e.g., white turns into black.
- Removing the background: The platform can detect the foreground subject of the image and erases the background.
 The maximum image size is 4472 x 4472 pixels with a maximum file size of up to 20 MB. Brikl supports the following image formats: png, jpg or jpeg, gltf (standard file format for three-dimensional scenes and models), and gif.
💡 Use 2048 x 2048 pixels for square product photos. This will ensure that your product displays well on mobile and desktop in high resolution. This also ensures that the pixel count is high enough to maintain its aesthetic when zooming in (which will show once the images are at least 800 x 800 pixels).
A newly uploaded image will initially appear at the bottom of the list.
Option 2: Reorder images
To reorder the images, click the edit sort order button to set the table in a different mode. You can change the image order in two ways:
- Changing the order number
- Dragging and dropping images
Once you’re ready, click ‘Save.’
Option 3: Deactivate images
You can deactivate images by toggling the "Active" button off. Deactivated images will not appear in your MicroStore.

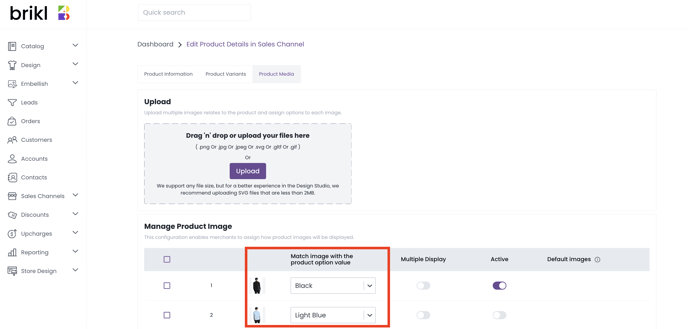
Option 4: Assign an image to a color
You can assign a product's images to the same product's color option values. By doing so, you can group images by color.
When a customer selects a color, "Light Blue," for example, it will only display the images on the product page that have been associated with the color in your dashboard settings.
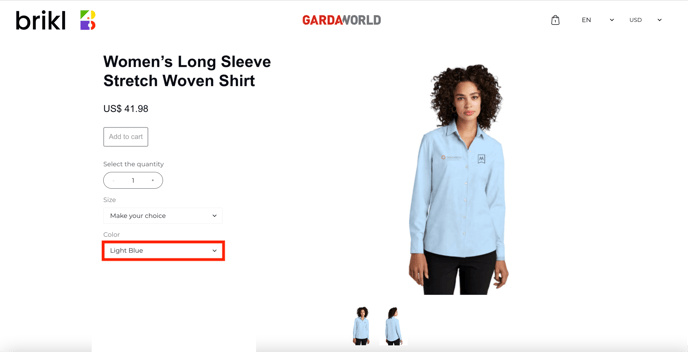
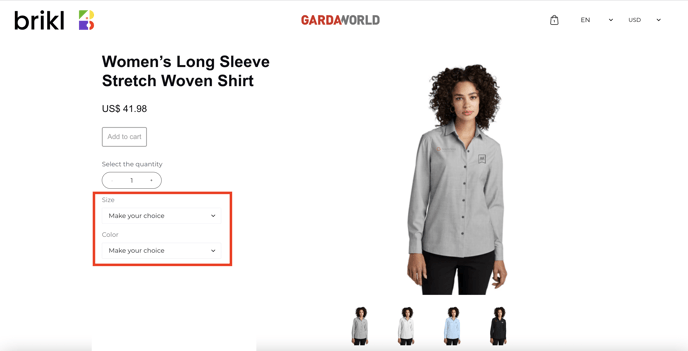
Color isn't selected when a customer accesses the product page for the first time. All product images will be visible until the color is selected from the dropdown field.
Option 5 - Display a single or multiple images
One product can contain multiple product images. You can either select them to display as a single product image or multiple product images on your MicroStore home page or MicroStore collection page.
If you do not turn the Multiple Image toggle on, only the default image will be shown on your MicroStore home page or MicroStore collection page.
You can display multiple images in MicroStore homepages and collection pages by turning on the "Multiple Image" toggle. All images that have been activated will be shown on both the homepage and collection page.